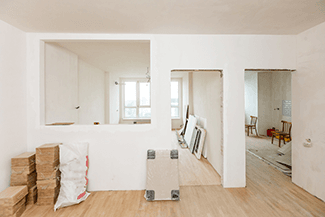
If you’re feeling a bit cramped or your home is compartmentalized, consider creating a passthrough between the living and kitchen. This project will help create the feeling of more space and will bring more light into the area.

The least invasive way to create more space between rooms is to create a passthrough.
IMPORTANT #1
Before you bust out the sledgehammer, you must determine whether the wall in question is a load-bearing wall.
Aload-bearing wall supports the weight of the floor or roof structure. Whereas, a non-load-bearing wall, sometimes called a partition wall, is responsible only for holding up itself.
How do you know it’s load-bearing? Unless you are very knowledgeable about framing, consult a structural engineer. Almost any interior wall can be a bearing wall or a shear wall. Also, check for wiring, ductwork, and water lines. If you have a fairly new house, contact the builder for blueprints.
IMPORTANT #2
If opening the wall requires any modifications or re-location of electrical or plumbing the job will require a building permit. This is not a job for a handyman and does not fall under the Handyman Exemption. Because a permit is required, you must use a professional contractor licensed by the Arizona Registrar of Contractors – like a Rosie-Certified Contractor for example – unless you literally will be performing the work yourself, which we highly do NOT recommended.
IMPORTANT #3
Additionally prior to 1978, drywall, drywall mud, and other interior finishes often contained asbestos and lead paint. In any house built prior to the early 1980s an evaluation should be completed by a qualified professional. Learn about lead and asbestos here.
How-To Cut a Pass-Through in a NON-Load-Bearing Wall
What You’ll Need
- Ear and eye protection
- Work gloves
- Dust mask or respirator
- Plastic sheeting and painter’s tape
- Non-contact voltage tester
- Stud Finder
- Screwdrivers
- Flat pry bar
- Hammer or sledgehammer
- Utility knife
- Reciprocating saw with demolition blade

Let’s Get To It
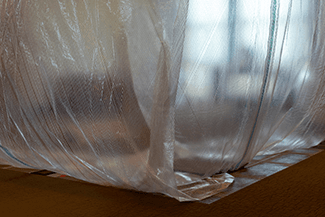
- Hang protective plastic sheeting between rooms and cover furniture.
- Turn off the power to all electrical circuits in the work area from your home’s electrical service panel (breaker box).
- Remove all outlet and switch covers from the wall. Check for voltage at each electrical box, using a non-contact voltage tester. If any outlets or switches will stay in place during the initial demolition, remove the outlet or switch screws and pull the device away from its electrical box.
- If there are water pipes located within the wall, shut off the water at the nearest branch shutoff (if available) or at the home’s main shutoff valve. If the pipes in the wall are vent or drain pipes, it is not necessary to shut off the water.
- Using a flat pry bar, remove all trim work, such as baseboards. Pry carefully if you are reusing the trim.
- Using a level, draw the outline for the opening.
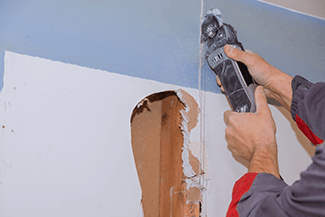
- Cut the opening using a reciprocating saw.
- Remove the wallboard and studs in the area of the new opening on both sides of the wall.
- Install the first cripple studs on either side of the opening.
- Install the sill plate into the bottom of the opening. Secure it with screws.
- Now install a header for the new opening and secure it with screws.
- Apply corner bead and complete drywall repair.
- Sweep the area and pick up nails. The Magnetic Nail Sweep makes this part of clean up really easy.
- Wipe down surfaces of drywall dust.
- Prime and paint the wall.
- Turn the electric and water back on.

Tips
This is a messy job. Anyone with respiratory problems should be kept out of the house until the job is complete and cleaned up.
- Cover nearby furniture and food.
- Remove pet bowls from the area.
- Tape dust shields over any air conditioning or return registers to keep dust from infiltrating the duct system.
- Enclose the work area by hanging clear plastic sheeting to contain dust. Drywall dust is extremely fine (yet abrasive) and can easily float from the work area if it is not properly sealed off.
- Be mindful of any remaining wiring, pipes, or ductwork inside the wall as you cut the drywall.
- Pick up fallen nails and other debris as you move along. A nail sticking out of wood or on the floor is an accident and a tetanus shot waiting to happen.
Tearing Down A Load-Bearing Wall
To ensure the safety of the home’s occupants and the structural integrity of the building, it is highly recommended that this job be left to a professional contractor. You don’t know what is lurking behind the drywall. Because a load-bearing wall provides structural support for weight loads above the wall, it cannot be removed without a new structure to take its place. Therefore, removing a load-bearing wall is a project that requires the services of a licensed contractor, not a handyman, but an Arizona Registrar of Contractors licensed, bonded, and insured contractor. A professional remodeling contractor will know what to look for, how to do it, and properly remedy any problems that arise.
You will find that a passthrough will create more light and make it easier for you to keep tabs on what’s happening in the next room.
Home Maintenance To-Do | #OpenSpaces
PODCAST
Opening up some space in your home? Before you start tearing down walls, know which walls are structural that you can’t touch until you consult with a structural engineer. Plus other preparations you need before you start this project. We also cover listener questions on a fully tiled pool, replacing an electric stove with a gas stove, the trend in countertops and Supercooling questions!


