
Clean and Care For Your Appliances
It is time to take care of those hard-working kitchen appliances! The following provides a quick rundown on how to keep them in ship shape plus some easy DIY tips, assuring longer life and better performance!
Not surprisingly, some of the more sophisticated models are more difficult to work on. Be sure to read your warranty and manual before using the appliance or doing any repairs on them.
Refrigerators
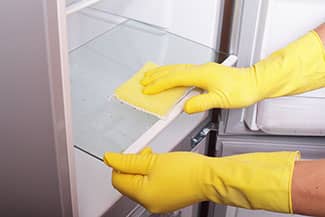
To do a deep clean by emptying all of the contents into an ice chest. Unplug the fridge and disconnect it from the water supply. Place a mat or cardboard on the floor and take care not to scratch the floor as you pull fridge out from the wall. You’ll want to brush off all the dust from behind and underneath fridge. Finish by mopping the floor space with vinegar water.
For the inside, remove shelves and bins and clean the interior with a mild cleaning solution and microfiber cloth. This is a good time to replace light bulbs or order new bins and shelves if needed.
If you have a water filter that is easily accessible, this would be a good time to install a new one (this is best done every 6 months or so). Daniel Beyer of Rosie on the House Certified Partner Beyer Appliance Service warns that when the plastic on the filter becomes brittle they can leak and cause a lot of damage.
Keep door seals clean by wiping them down periodically. Close the door with a piece of paper half in the fridge and half out. If the door holds the paper the seals are in good shape. If the rubber seals are beginning to crack, it’s probably time to schedule a tech to replace them.
Most importantly: clean those coils! Remove the grate (found at the top or bottom of the fridge) and clean the coils by vacuuming once every six months, even if you don’t clean the whole fridge. The coils need to be dust-free to do their job; dust-laden coils can suffocate the fridge causing the compressor to work harder. Compressors are the costliest fridge repair so giving them a little extra love goes a long way for protecting your investment.
Microwaves
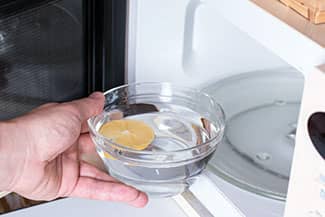
To make cleaning out the microwave easier in the future, cover dishes with paper towels when cooking or warming food to prevent splattering. Place a bowl of water and vinegar in the microwave and run on high for a few minutes to help loosen any gunk. Remove the bowl and wipe down the walls and glass plate. Clear clutter around unit and wipe down the exterior including underneath if you can move it. Inexpensive, independent units are best replaced when broken. If you have a more expensive built-in unit, a licensed repairman can often repair the unit saving the expense of replacing the whole unit.
Dishwasher
Remove the racks and spray down the interior. Order new racks online if you find they are rusting and losing their adjustment functions. Rack life can be prolonged by ordering a tip replacement kit before they get too rusty. Clean the trap and the filter at the bottom of the inside of the unit. Quarterly, pour 2 cups of vinegar and a teaspoon of baking soda in the bottom, close the door, and run the Sani-Rinse cycle. Make sure the rubber gaskets are tight to the frame and replace if they keep coming loose. If you start to find food particles in your dishwasher it is time to have your drain loop checked; this is the line that keeps your disposal water out of the dishwasher.
Ovens
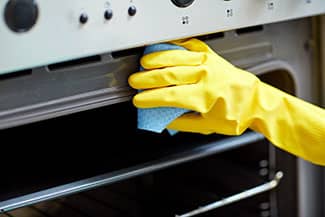
Clean ovens regularly to keep baked foods from tasting and smelling burnt. Most ovens now have self-cleaning cycles and homeowners can set a timer for the cleaning to be done during off-peak energy hours.
If you prefer to clean it yourself or the self-cleaning function does not work:
- Try to use non caustic cleaners first.
- Cold oven cleaners take longer but they have less chemical smell.
- Make a cleaning paste of baking soda and vinegar, apply it to interior of oven. Let it set for at least 30 min and wipe it clean.
- Put a pan with water in the oven and bake it on low for 30 minutes. The steam/moisture created will help loosen gunk and grime.
This is a job that pays off to do as spills happen!
DIY repairs for ovens
BE SURE ELECTRICITY IS TURNED OFF.
Not all ovens have elements that are easy to replace. Check your manual and warranty first. Light bulbs are relatively easy to replace but, can easily break in the socket. If you do replace the bulb yourself, be sure you are using a bulb made specifically for ovens. Do not try to remove these unless electricity to the unit is off.
If you need an appliance repaired Rosie on the House Certified Partner Beyer Appliance Service works on most makes and models. They have an extensive warehouse of parts as well for those DIY appliance repairs.
###
Homeowner Handbook To-Do | #JunkUnderAppliances