
Last Updated 11.19.2024
When you moved into your house 10 years ago, you promised yourself you’d update the place. But like most homeowners, the longer you live there, the less you notice the 40-year-old light fixtures, the wallpaper from the 1970s, and the sunken living room.
Maybe you plan on staying in your home for a while or maybe you would like to sell it. Here are five fixes to make bring the house up to date and make it more livable.
*NOTE Most of these projects require a permit. Permitting is an important step to ensure that projects are done safely. If you decide to sell your home and have not permitted the work, it could mean a delay or loss of sale.
1 | Bring Carbon Monoxide, Fire and Smoke Alarms up to Code
Before you start any remodel check with your municipality about the current requirements for smoke, fire and carbon monoxide (CO) detectors. Many cities will not issue any permits on a house that needs to be renovated until the house is brought up to code in this area.
The requirements can be quite specific and include the bedrooms, hallways, kitchen, living areas and even the garage. The requirements include alarm systems that are on a dedicated arc-fault circuit, i.e. hardwired.
2 | Fill in the sunken living room.

Sunken living rooms were all the rage in the 1950s and 1960s; to some extent they are popular today. But they do present some problems. Most of them take up a whole living space that can be a step of from six to eight inches down from another room. That can be a hazard for aging baby boomers and small children.
But you can raise the level of the floor to fill in the sunken room. After you empty the living room of furniture and remove any floor covering and have a termite inspection. Get the area treated for termites to avoid future problems. Then remove all the wood pieces surrounding the old floor, including baseboards.
A contractor may have to adjust some things in the surrounding walls as well, like raising electrical outlets and switches. Next, workers will bring in the aggregate base course and new concrete to fill the sunken area. The new concrete can sometimes be pumped in, depending on the distance from the street where the concrete truck will be and your living room.

You want to match the new subfloor’s height to that of the subfloor in the adjoining room. You may also have to match the flooring in other areas. You can stay in the house while all this is going on but it’s going to be slightly humid for the next couple of days because of the wet concrete.
3 | Get rid of the fluorescent lights put in recessed can lights.
Maybe a box was built into the ceiling over your kitchen or bathroom and was covered with sheets of plastic. Behind the plastic, a builder hung fluorescent lights. Now you’d like to switch to individual recessed can lights. You shouldn’t just build the can lights into the empty box as they would cast unsightly shadows. In a case like that you must add insulation as well as add electrical connections for new lighting, but you also have to put in new sheetrock to create a level ceiling.
If you’re just removing a fluorescent fixture that’s on top of a level ceiling, you need to remove the old fixture, repair the drywall and rewire and insulate for the can lights. Some painting will have to be done in both cases.

If you still have that plastic covered recessed ceiling in your kitchen, we admire your tenacity. The recessed surface is typically the bottom cord of your roof trusses, and the rest of the solid ceiling is non-load bearing framework that can be removed. We think it’s time to remove the ‘dropped’ ceiling, lose the ubiquitous florescent light fixture, and install some energy efficient recessed LED lights. Finishing the project can include painting the ceiling, cleaning the upper cabinets from drywall and dust, and tacking crown molding to the top face of the cabinets to create a finished look. You will love the new head space that gives the kitchen a larger look and feel.
4 | Replace all your original toilets even if you don’t remodel the room itself.
A 20- to 30-year-old toilet will be less efficient than newer models. Modern toilets use significantly less water and a new one can enhance the appearance of a bathroom. They come in many different shapes now than they used to. This project can become a bigger project if you choose a new toilet that has a smaller base and is shaped differently than the one you are replacing as you might have to change the flooring to fit the new fixture.
5 | Turn your carport into a garage.
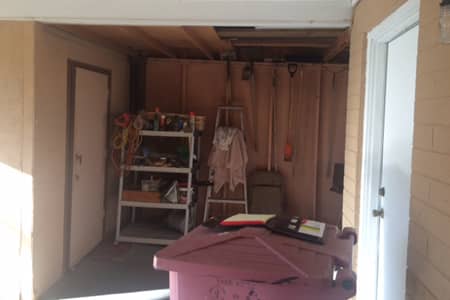
Closing in a carport is a great way to add square footage to your home, but don’t just put up walls on a slab under your wide open 1950s era carport or you could have flooding problems in the next big storm. You or a contractor must build up a masonry stem wall that is about six to eight inches high, around the perimeter of the concrete slab of the carport/garage. A concrete block system can be used to do this, but don’t skip this step. If you use wood, instead of masonry for the stem wall you can end up with mildew, dry rot and termites. For a wood wall construction, a series of 2×4 plates, studs and bearing posts needs to be tightly installed on top of the stem wall to support the roof and walls. (For more photos and more step-by-steps click here.)
Additional Information
- Lead – if your home was built before 1979 it may contain lead paint. For more details call 1-800-LEAD to receive more info or visit the EPA website
- Asbestos- homes built between 1940 and 1980 could have building materials that contain asbestos. Visit the EPA website for more info
###
Homeowner Handbook | #ChimneyCare
PODCAST
Holiday tips include organizing your kitchen, fridge and other things around the home before guests arrive with Bridges Connor of Get Organized With Bridges. Electrical check before you hang those outdoor Christmas lights. What is Brown Friday? And homeowner questions on heating a pool and replacing an aged roof.
Broadcast Archive Page With Expanded Content
PHOTO CREDIT
RELATED CONTENT:
- Blog: Presto! Your Carport Becomes a Garage
- Blog: 20 Ideas to Catch a Buyers Eye for Less than $500
- Blog: Cool down your garage with a mini-split AC unit.
- DIY Q&A: DIY Projects that Require a Building Permit
- DIY Q&A: Remodeling Tricks that Save Money
- Subscribe to our weekly Home Improvement Podcast!